Hardlink, Symlink and Junctions

To create a softlink, which should work through a network share, a junction should be created with mklink:

[...]mklink
Creates a symbolic link.

MKLINK [[/D] | [/H] | [/J]] Link Target

        /D      Creates a directory symbolic link.  Default is a file
                symbolic link.
        /H      Creates a hard link instead of a symbolic link.
        /J      Creates a Directory Junction.
        Link    specifies the new symbolic link name.
        Target  specifies the path (relative or absolute) that the new link
                refers to.

[via]https://www.windowspro.de/andreas-kroschel/ntfs-dateiverknuepfungen-links-unter-windows-7[/via]

Remove VMware VIBs/VIB conflict

 ~ # esxcli software vib list | grep Mel
net-mst 2.0.0.0-1OEM.550.0.0.472560 Mellanox VMwareCertified [...]

~ # esxcli software vib remove -n net-mst
Removal Result
   Message: The update completed successfully, but the system needs to be rebooted for the changes to be effective.
   Reboot Required: true
   VIBs Installed:
   VIBs Removed: Mellanox_bootbank_net-mst_2.0.0.0-1OEM.550.0.0.472560
   VIBs Skipped:
~ #

FDTI USB-to-Serial adapter showing only gibberish

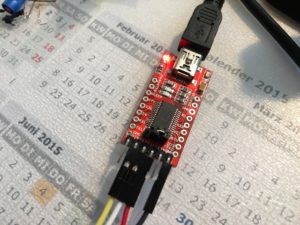
I order two new - cheap - FTDI FT232RL USB-to-Serial Adapters on AliExpress.

IMG_7764

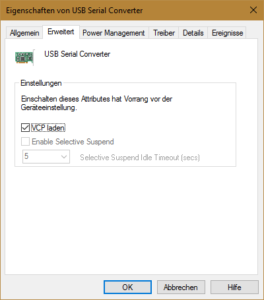
After connecting, the first disappointment came directly. The Windows Device Manager displayed no COM port. Only a USB Serial Converter. The update of the driver brought no improvement. By coincidence I discovered the "Load VCP" option. After I activated this, the USB Serial Interface was displayed correctly.

2016-09-04 16_49_23-Eigenschaften von USB Serial Converter

Quickly the next disappointment came, both showing only gibberish.

I thought at first that the baud rate is incorrect, but with an older adapter it working correctly. On the FTDI website i found a tool called "FT_Prog". With these programming utility you can read and write the EEPROM for use with FTDI devices. After a few clicks I could see the difference:

2016-09-04 16_24_14-FTDI - FT Prog - Device_ 0 [Loc ID_0x212]

2016-09-04 16_28_39-FTDI - FT Prog - Device_ 0 [Loc ID_0x212]

Since I was not sure if there are other differences, I used the template function of the tool to copy the settings.

2016-09-04 16_37_31-FTDI - FT Prog - Device_ 0 [Loc ID_0x212]

2016-09-04 16_38_10-FTDI - FT Prog - Device_ 0 [Loc ID_0x212]

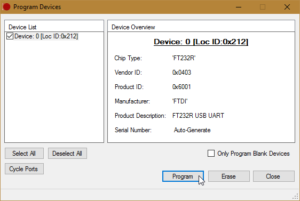
2016-09-04 16_38_39-Program Devices

Allow Remote Desktop login with saved credentials

When trying to use saved credentials in Remote Desktop Connection you might receive this message:

Your credentials did not work. Your system administrator does not allow the use of saved credentials to log on to the remote computer because its identity is not fully verified. Please enter new credentials.

To be able to use saved credentials in this situation you need to do the following:

  1. Open Group Policy Editor (gpedit.msc)
  2. Navigate to Local Computer Policy\Computer Configuration\Administrative Templates\System\Credentials Delegation\
  3. Open Setting Allow Delegating Saved Credentials with NTLM-only Server Authentication, set it to Enabled click on button Show... and in Show Contents window add Value TERMSRV/*
  4. Run gpupdate command to update your policy.

Now you should be able to use your saved credentials.

[via]http://answers.microsoft.com/en-us/windows/forum/windows_7-security/remote-desktop-connection-not-using-saved/13a17d84-b008-4767-95fb-b891e9e6bc66?auth=1[/via]

Add password to .p12/.pfx-certificate

With following procedure you can change your password on an .p12/.pfx certificate using openssl.

Export you current certificate to a passwordless pem type:

openssl pkcs12 -in mycert.pfx/mycert.p12 -out tmpmycert.pem -nodes
Enter Import Password: <Enter no password>
MAC verified OK

Convert the passwordless pem to a new pfx file with password:

openssl pkcs12 -export -out mycert2.pfx/mycert2.p12 -in tmpmycert.pem
Enter Export Password: <Enter password here>
Verifying - Enter Export Password: <Enter password here>

Now you are done and can use the new mycert2.pfx file with your new password.

[via]http://stackoverflow.com/a/35158695[/via]

forfiles – run commands for each file in a location

forfiles allows command line users to run commands for each file in a location. Some of the tasks that the forfiles command can be used to do are deleting old files and renaming files. It a native command in Vista or newer. For WinXP you can find it in the Recource Kit.

Example:

forfiles -p "E:\VideoArchiv" -s -m *.asf -d -01.01.2014 -c "cmd /c echo @path >> E:\del.txt"